Getting Up and Running Locally With Docker
The steps below will get you up and running with a local development environment. All of these commands assume you are in the root of your generated project.
Prerequisites
Docker; if you don’t have it yet, follow the installation instructions;
Docker Compose; refer to the official documentation for the installation guide.
Install
Download the MapnikTileServer & openstreetmap-carto.:
$ git clone git@github.com:OpenHistoricalDataMap/MapnikTileServer.git
$ git clone git@github.com:linuxluigi/openstreetmap-carto.git
Go to the MapnikTileServer and build up all images. This could take some time.:
$ cd MapnikTileServer
$ docker-compose -f local.yml build
Download the shape files.:
$ docker-compose -f local.yml run --rm django /get-shapefiles.sh
Create the base mapnik style XML.:
$ docker-compose -f local.yml run --rm django python manage.py create_style_xml
Start the postgres server and create the mapnik tables.:
$ docker-compose -f local.yml up -d postgres
$ docker-compose -f local.yml run --rm django python manage.py migrate
Create a demo OHDM database.:
$ docker-compose -f local.yml up test-database
Convert the OHDM data into mapnik tables (osm2pgsql).:
$ docker-compose -f local.yml run --rm django python manage.py ohdm2mapnik
Start celery worker & beat.:
$ docker-compose -f local.yml up -d celerybeat celeryworker
Start the django web server.:
$ docker-compose -f local.yml up django
Now test on http://localhost:8000/2020/01/01/0/0/0/tile.png if you see the world mapnik like below.

Fig. 8 world map
To check if the demo data was set up right, go to http://localhost:8000/YEAR/MONTH/DAY/11/57/1134/tile.png. But change YEAR, MONTH & DAY to your current day. For example the like for the 2020-05-27 will be http://localhost:8000/2020/05/27/11/57/1134/tile.png The result should look like the tile below.
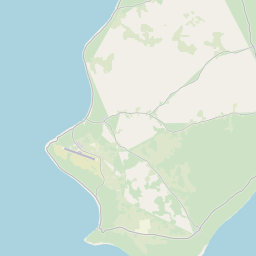
Fig. 9 niue